Looking for a fun, screen-free activity that sparks creativity? clay pinch pots are one of the simplest and most rewarding art projects you can do with children. With just a ball of clay and a few basic tools, kids can create their very own pottery pinch pot in minutes.
This hands-on clay activity is perfect for weekends, rainy afternoons, or homeschool art time. Best of all, you don’t need a kiln! Using air-dry clay makes this one of the most accessible clay projects for kids and a fantastic option for easy art for kids of all ages.
Whether you’re planning structured art lessons or just looking for creative clay crafts for kids, pinch pots are a wonderful place to start.
How to Make a Pinch Pot
Making a pottery pinch pot is surprisingly simple. Even young children can master the basic technique with a little guidance.
What You’ll Need:
- Air-dry clay (I recommend DAS air-dry clay)
- A smooth surface
- A small bowl of water
- Optional: sculpting tools, toothpicks, or a spoon
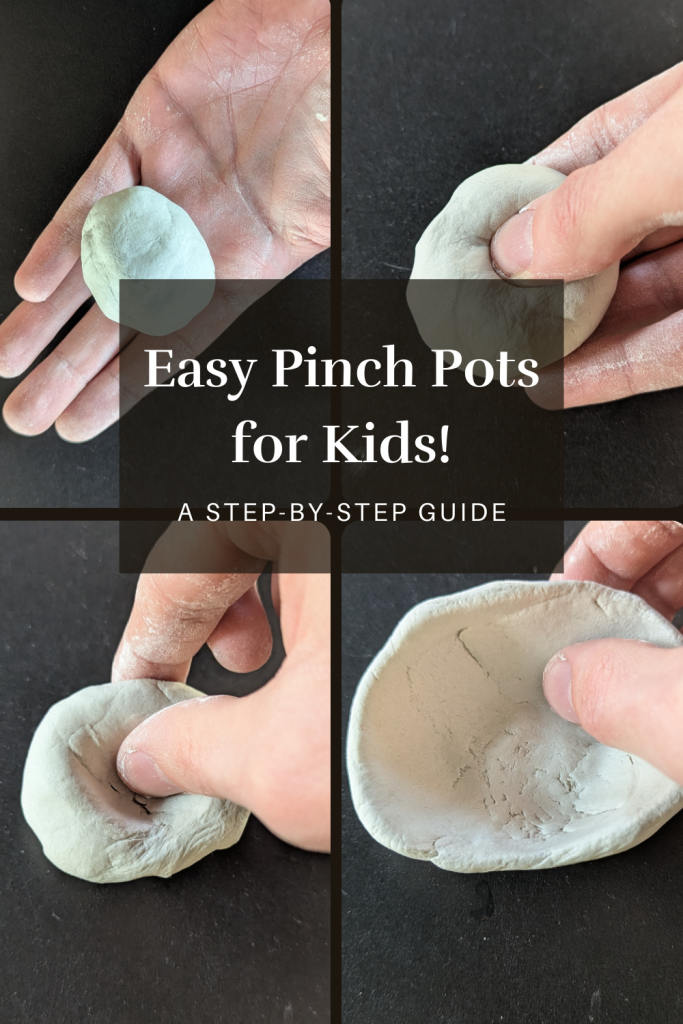
Step-by-Step Instructions:
1. Roll a ball

Start by rolling the clay into a smooth ball about the size of a golf ball.
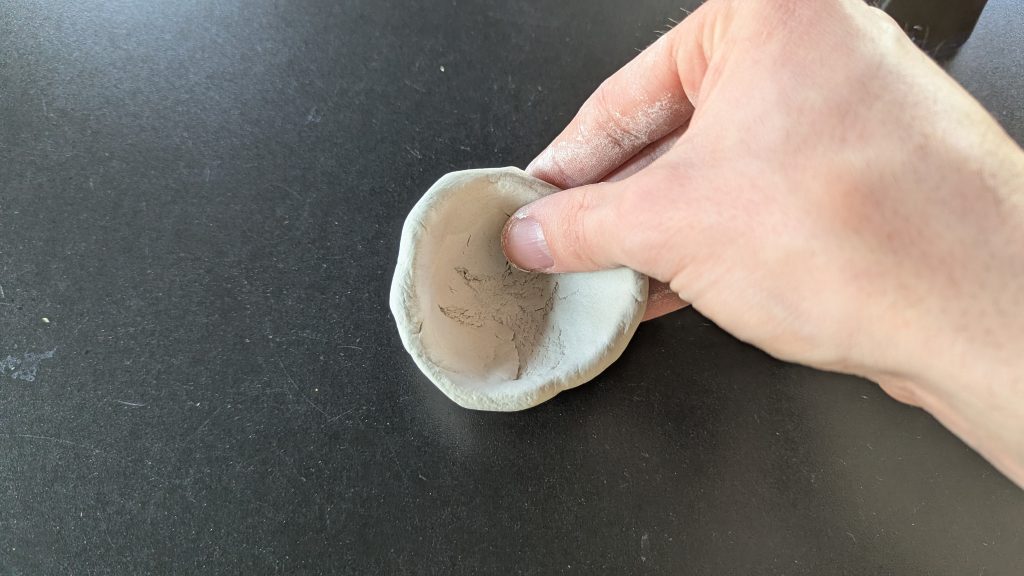
2. Make a thumb hole
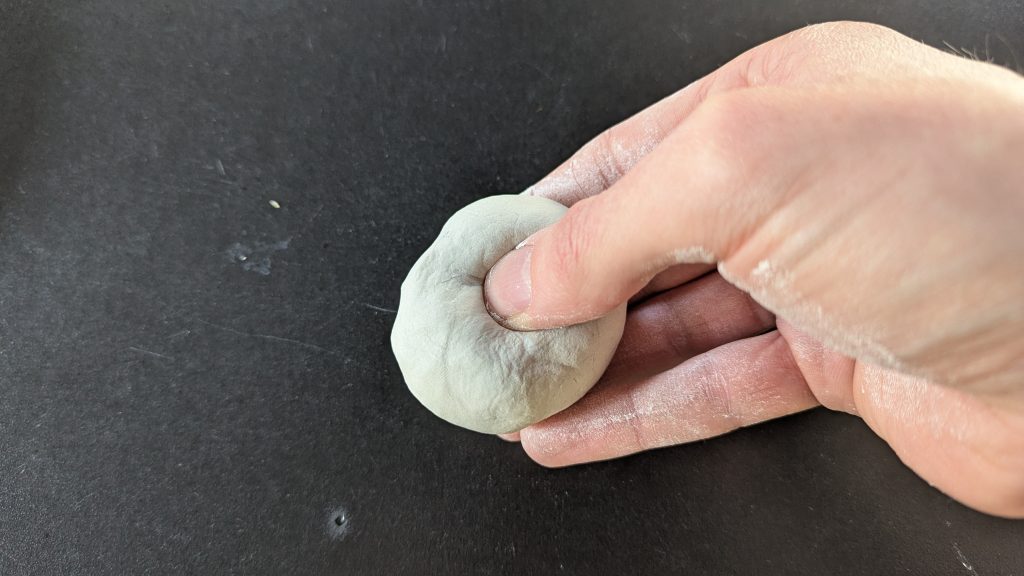
Press your thumb gently into the center of the ball. Be careful not to push all the way through.
3. Pinch and rotate
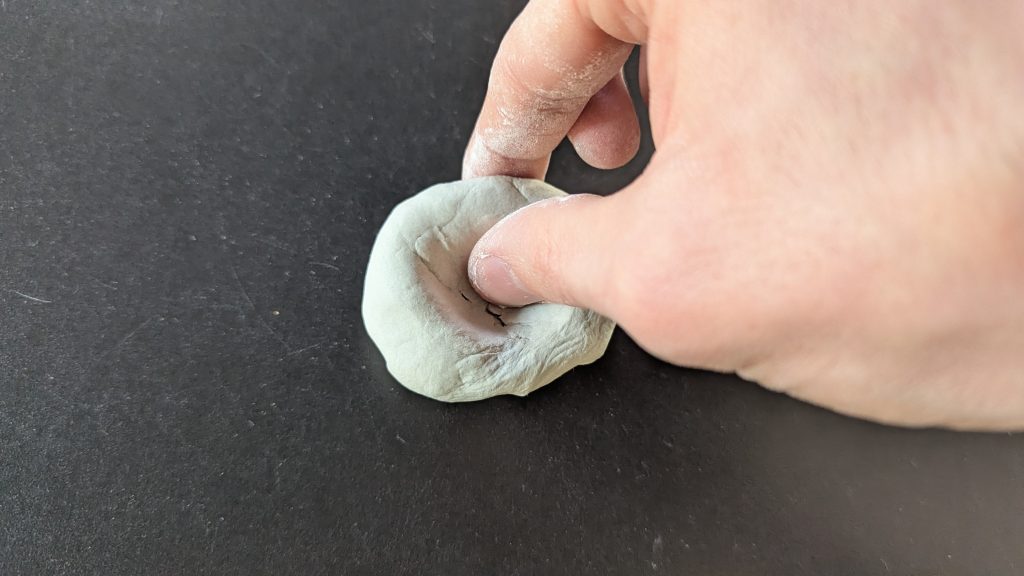
Hold the clay in one hand and use your thumb and fingers to gently pinch around the edges while slowly rotating the ball. This widens the opening and forms the pot shape.
4. Even out the walls
Keep pinching lightly until the walls are about ¼ inch thick. Try to keep the thickness even to prevent cracking later.
5. Smooth the surface
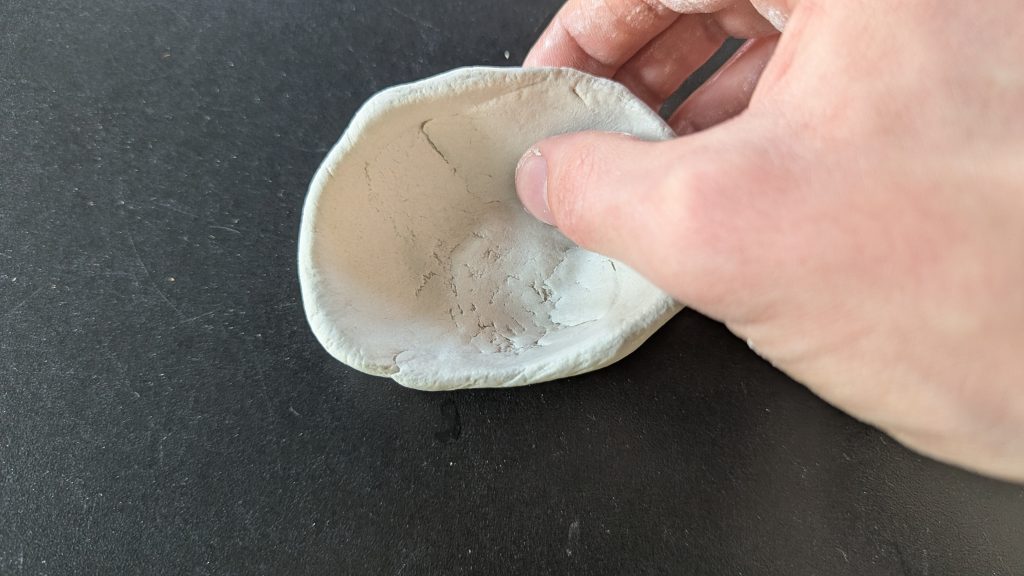
Dip a finger in water and gently smooth out any cracks or rough spots.
6. Cover the Clay and Let it Dry
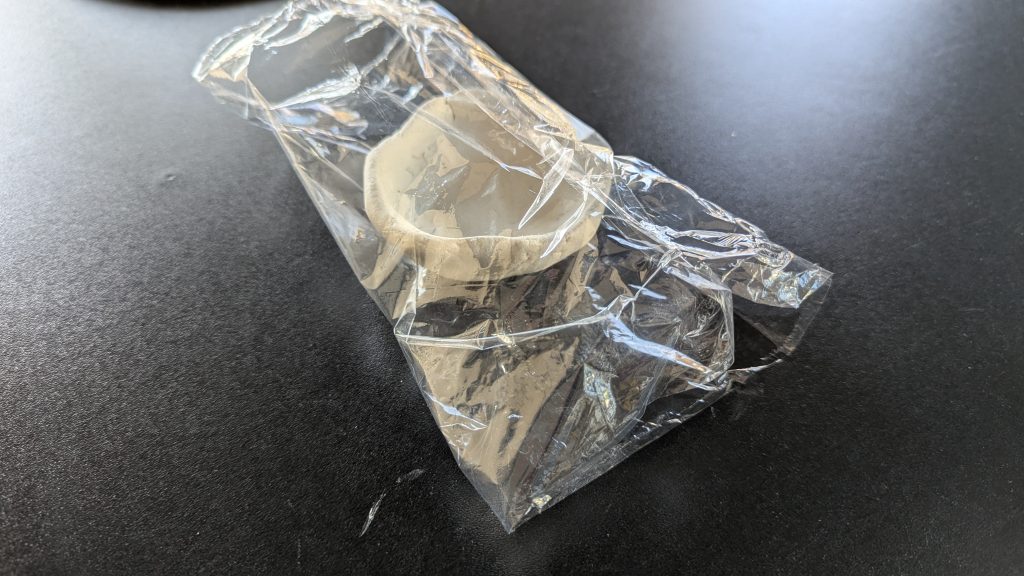
Cover clay with some clin film or a damp towel. Leave some space for air to reach the clay. This will allow the air dry clay to dry slowly and controlled and avoid cracks.
That’s it! You’ve made a basic clay pinch pot. Now it’s time to decorate and get creative with different air dry clay pinch pot ideas.
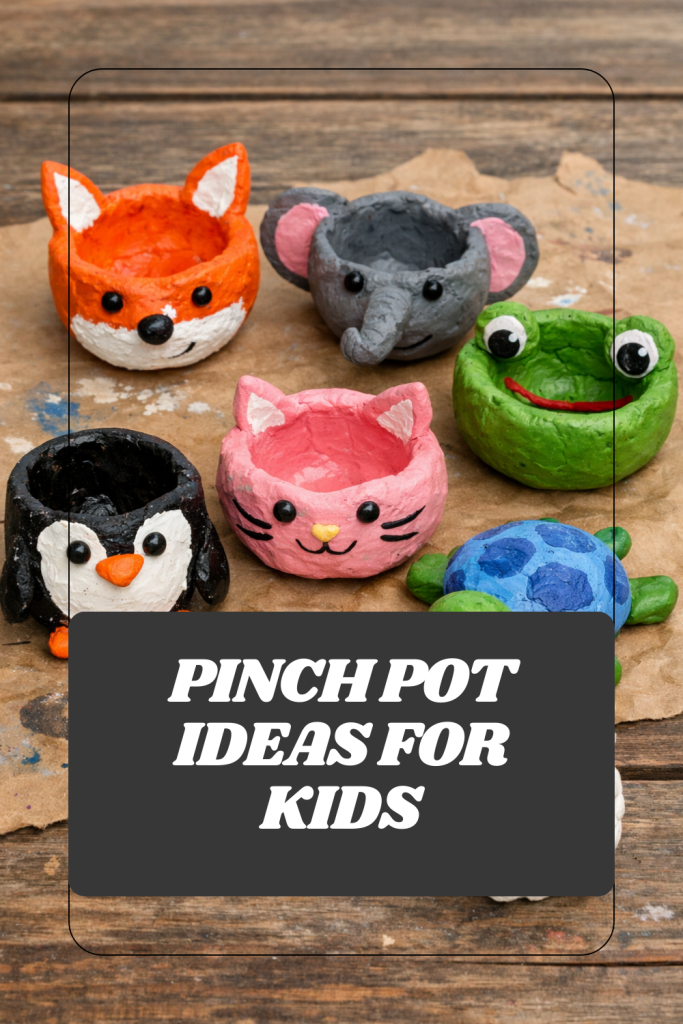
Pinch Pot Ideas for Kids

Once children learn the basic technique, the possibilities are endless. These air dry clay pinch pot ideas will inspire kids to turn simple pots into playful creations.
1. Animal Pinch Pot
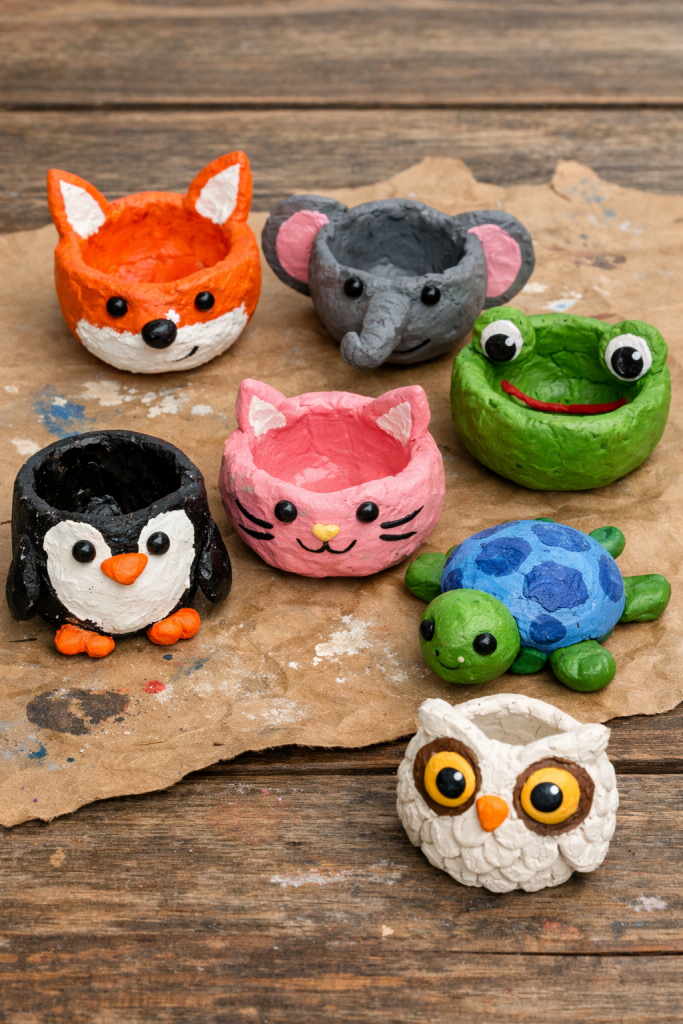
Transform your pot into a cute animal! Add small clay pieces for ears, noses, tails, or paws. A pinch pot can easily become:
- A cat (triangle ears and whiskers)
- A turtle (add a textured shell pattern)
- An owl (big round eyes and tiny beak)
This is one of the most popular clay crafts for kids because it combines sculpting and storytelling.
2. Rainbow Pinch Pot
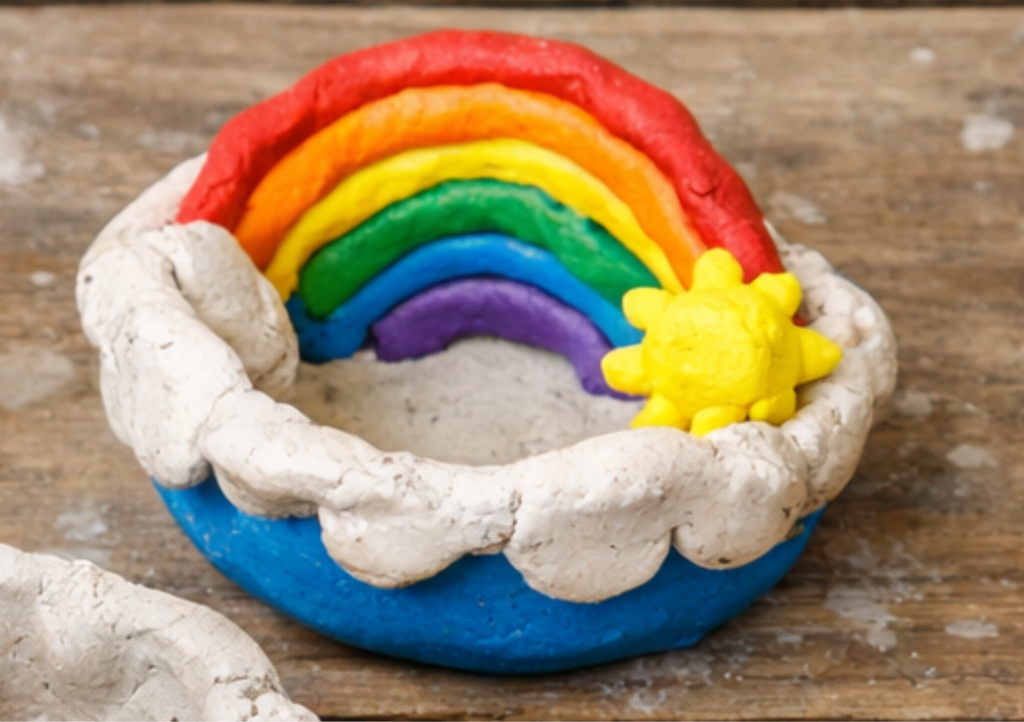
After the pot dries, paint it in bright rainbow colors. Blend stripes around the outside or paint a cheerful rainbow inside the bowl.
This colorful option is perfect for easy art for kids who love bold designs and bright paints.
3. Snake Basket Pinch Pot
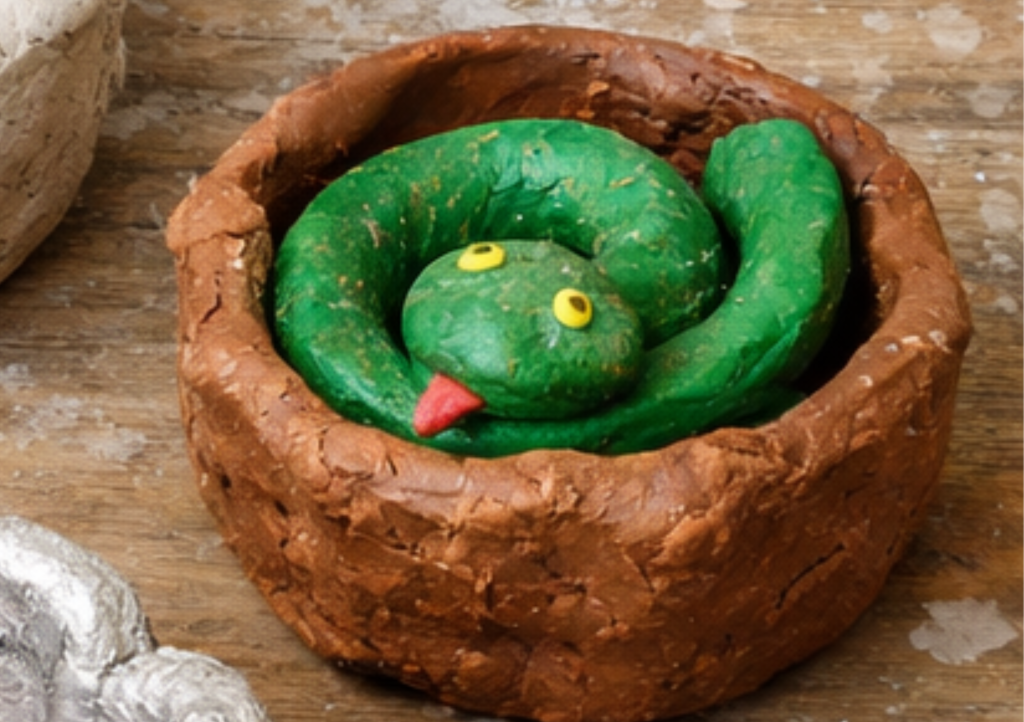
Create a small basket-style pinch pot and then roll a long clay “snake.” Attach it around the rim to form a coiled edge or even a handle.
This design adds texture and makes a fun variation on traditional clay projects for kids.
4. Monster Pinch Pot
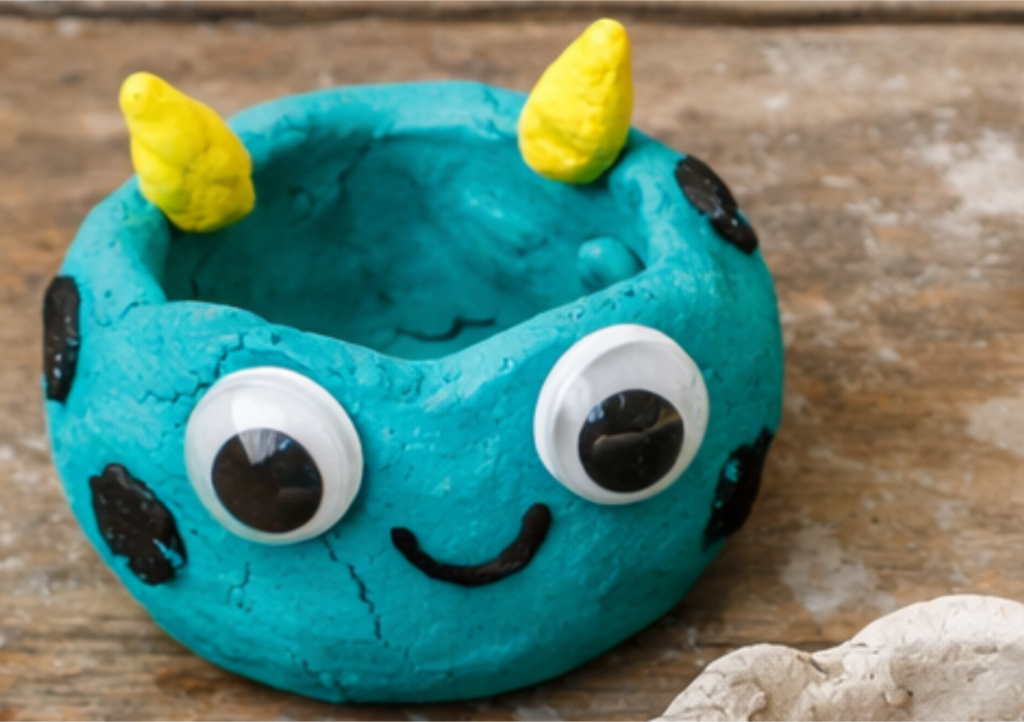
Let imagination run wild! Add:
- Googly eyes
- Clay horns
- Silly teeth
- Bumpy textures
Monster designs are especially great as art activities for toddlers because there’s no “right” way to make them.
5. Pinch Pot with Flowers
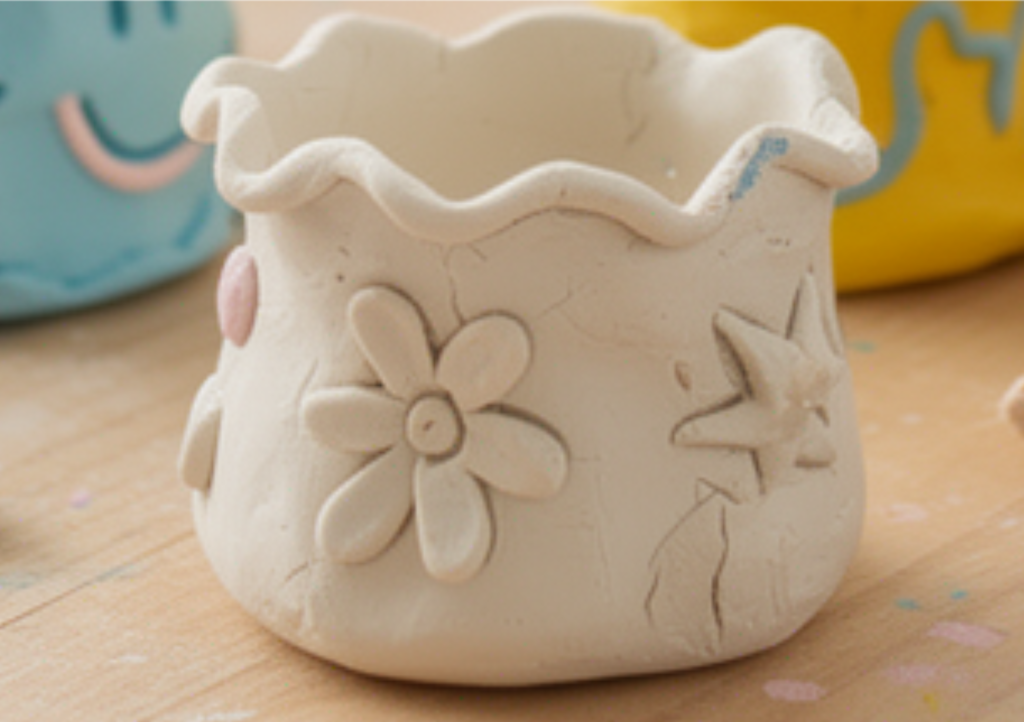
Decorate the outside with small clay flowers. Roll tiny balls and flatten them into petals, then attach them using a bit of water.
This makes a beautiful gift idea and introduces kids to layering techniques in a simple clay activity.
Common Issues and How to Prevent Them
Working with air-dry clay is easy, but a few common problems can pop up. Here’s how to avoid them.
How to Dry Air Dry Clay Properly
- Let pinch pots dry at room temperature.
- Place them on a breathable surface like cardboard.
- Turn them gently after 24 hours so the bottom dries evenly.
- Avoid placing them near heaters or direct sunlight, which can cause cracking.
- Cover them partially with either a damp towel or some cling film.
Drying usually takes 24–72 hours depending on thickness.
How to Avoid Cracks in Air Dry Clay
Cracks are usually caused by uneven thickness or drying too quickly.
To prevent cracking:
- Keep walls evenly thick (about ¼ inch).
- Smooth small cracks with a damp finger before drying.
- Attach decorative pieces securely using water as “glue.”
- Cover loosely with plastic for the first day if your environment is very dry.
Taking time during the shaping stage makes a big difference.
I have a full guide that shows you how to prevent and fix cracks in air dry clay.
How to Paint Air Dry Clay and Avoid Paint Chipping
Once completely dry:
- Lightly dust off the surface.
- Use acrylic paint for best coverage.
- Apply thin layers instead of one thick coat.
- Let each layer dry before adding another.
- Seal with a clear acrylic sealer if you want extra durability.
Sealing is especially helpful if the pinch pots will be handled often.
Here is a step-by-step guide on how to paint air dry clay.
How to Glaze Air Dry Clay
Once your pinch pot is fully cured and painted you might want to glaze the air dry clay to protect it from water and add a nice shiny or matte finish. I have a complete guide that shows you all the different ways to glaze air dry clay.
Guide that shows you how to glaze air dry clay to protect it.
Final Thoughts
Air-dry clay pinch pots are one of the easiest and most satisfying clay projects for kids. With just a simple pinch technique, children can create animals, monsters, rainbow bowls, and more.
This timeless pottery pinch pot method builds fine motor skills, encourages creativity, and makes a wonderful clay activity for home or classroom use. Whether you’re planning structured lessons or casual art activities for toddlers, pinch pots are a fantastic introduction to clay crafts for kids.
Best of all, anyone can try it. No kiln required!