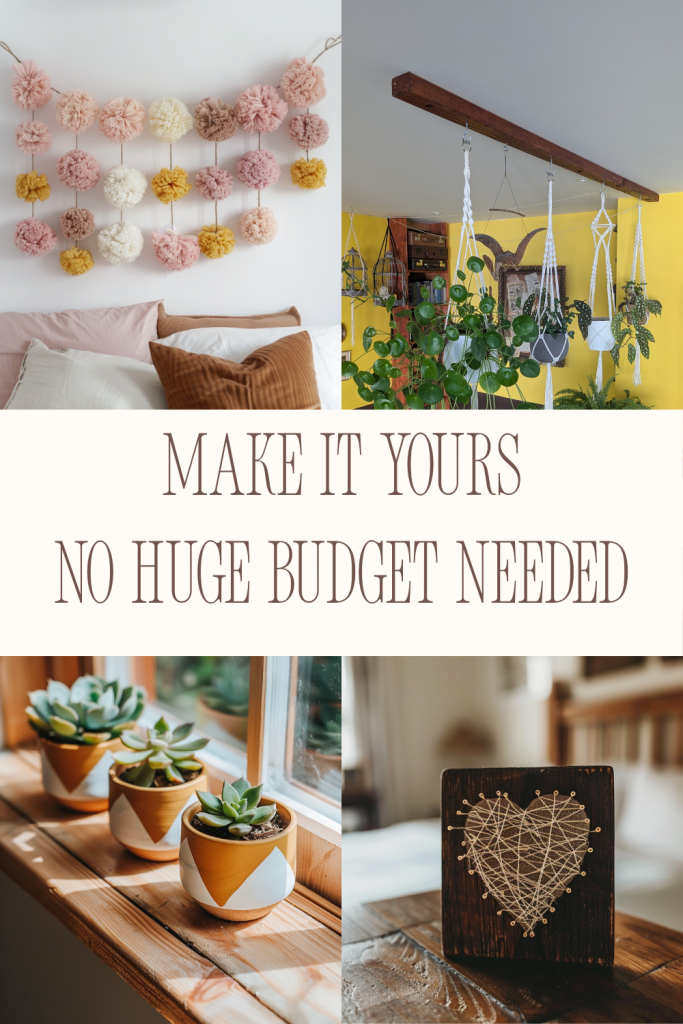
Your bedroom should feel like yours. Not like a hotel room or a catalog page, but yours. The problem is that store-bought decor all starts to look the same after a while, and most of it costs more than it’s worth.
The good news?
Easy DIY room decor is genuinely within reach for anyone, even if you’ve never made anything before. You don’t need special tools or a craft room. Most of these projects take under an hour and use supplies you can find at any dollar store or craft shop.
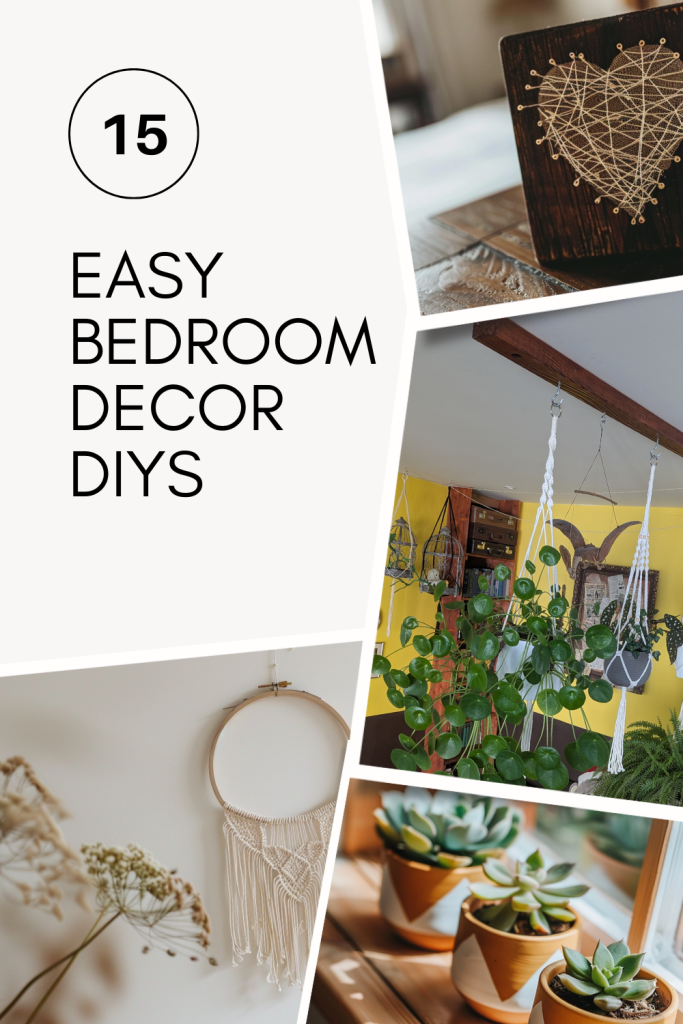
In this post, I’ll walk you through 15 of my favorite DIY bedroom decor ideas. Each one is beginner-friendly, budget-conscious, and completely customizable to your style. Whether you’re looking for cool teenage room ideas, want to build a dream room setup, or just need a few fresh room ideas for your bedroom. There’s something here for you.
What You’ll Generally Need
Before we get into the projects, here are the supplies that come up again and again:
- Acrylic paint and brushes
- Hot glue gun and glue sticks
- Scissors
- Cardstock or thick paper
- Yarn, wool string, or twine
- A wooden dowel or embroidery hoop
- Air dry clay
- Terracotta pots
- Mason jars
- Canvas panels
- Picture frames
You won’t need all of these for every project. I’ll list exactly what you need for each one below.
1. DIY Photo String Light Display

This is one of the easiest and most impactful things you can do for a bedroom. String lights make any space feel warmer and more personal. Adding your own photos turns them into something truly unique.
What you need:
- Fairy lights or string lights
- Mini clothespins or paper clips
- Printed photos or Polaroid-style prints
- Thumbtacks or small nails
How to make it:
Run the string lights along a wall above your bed or desk works well and fix the ends with thumbtacks. Use mini clothespins to clip your favorite photos along the length of the lights. You can mix photos with small handwritten notes, ticket stubs, or drawings. That’s really all there is to it. Simple, personal, and it looks incredible at night.
Tip: Print photos in 4×6 size for the best balance between visibility and fit. Black and white prints give a cleaner, more aesthetic look.
2. DIY Flower Pot Hanger
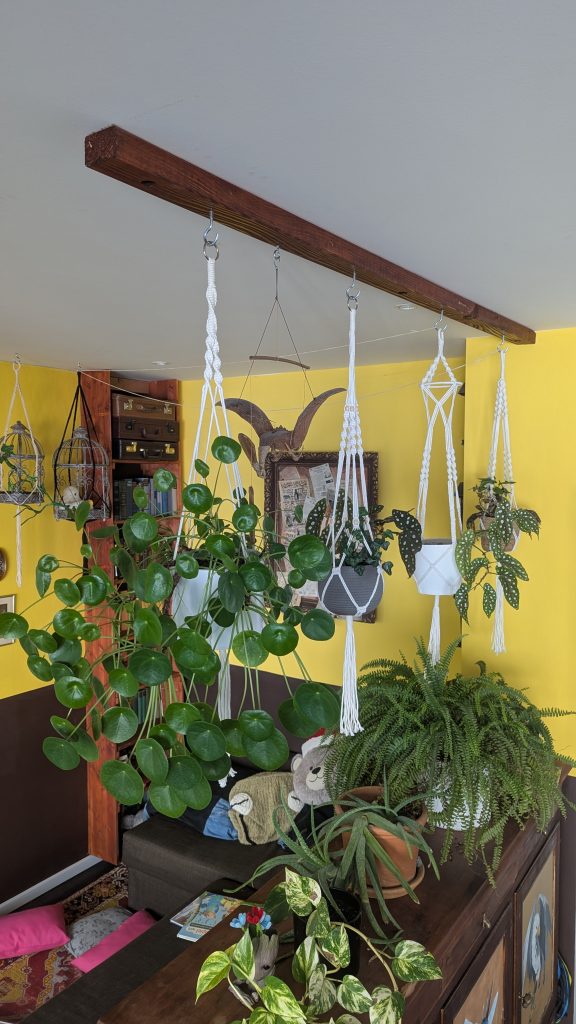
This one is a bit more of a project, but the result is genuinely stunning. A row of hanging flower pots adds greenery at eye level, brings texture into the room, and can even act as a subtle divider between different areas of a larger bedroom.
What you need:
- A 2×4 piece of wood (cut to your desired length)
- Wood stain
- A drill and screws
- Ceiling anchors or wall brackets for mounting
- Small screw-in hooks
- Wool string or macramé cord (for the pot hangers)
- Terracotta or lightweight plastic pots
- Plants of your choice
How to make it:
Start with the wood. Apply wood stain with a cloth or brush and let it dry fully one coat is usually enough for a natural, slightly darkened finish, but add a second if you want it deeper. While it dries, make your pot hangers.
Cut four equal lengths of wool string for each pot. Hold them together, fold in half, and tie an overhand knot near the fold to create a loop for hanging. Space the four strands out evenly and tie a second knot around 10–15 cm below, bringing all four strands together to cradle the base of the pot.
Once the wood is dry, drill pilot holes at even intervals along the plank and screw in the hooks. Mount the plank to the ceiling using appropriate anchors make sure they’re rated for the weight.
Hang each pot hanger from a hook, drop in the pot, and add your plant.
Tip: The hanging row of pots works especially well between a sleeping area and a desk or reading corner. It creates a gentle visual separation without closing off the space the way a wall or curtain would.
Tip: Choose trailing plants like pothos, string of pearls, or ivy. They grow downward and emphasize the hanging effect beautifully.
3. DIY Gallery Wall
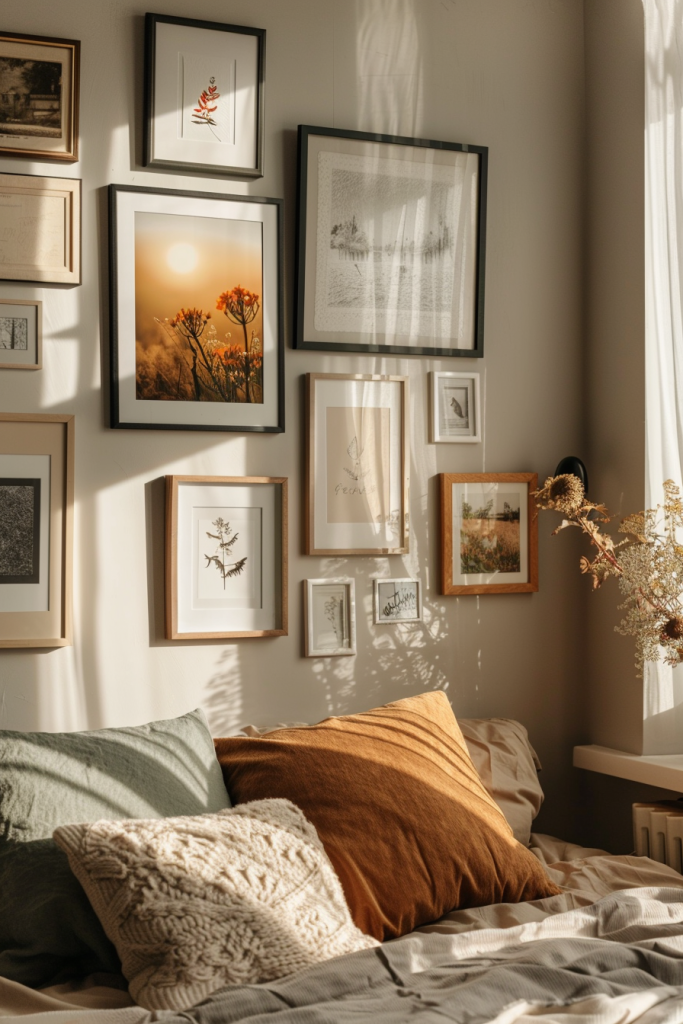
A gallery wall is one of the most popular bedroom wall decor ideas because you can make it completely your own. Mix frames of different sizes, photos, prints, postcards, and small canvases until the wall actually reflects who you are.
What you need:
- Frames in various sizes (dollar stores often have these cheaply)
- Printed photos, art prints, or postcards
- Command strips or small hooks
- Paper and painter’s tape for planning the layout
How to make it:
Before you put anything on the wall, plan the layout on the floor. Arrange your frames until you’re happy with the balance, then take a photo of the arrangement for reference. Trace each frame onto paper, cut out the shapes, and tape them to the wall to map the positions before committing to anything permanent. Once you’re happy with the layout, hang everything using command strips.
Tip: Mixing frame colors black, white, and natural wood almost always looks better than matching everything perfectly.
4. DIY Painted Terracotta Pots
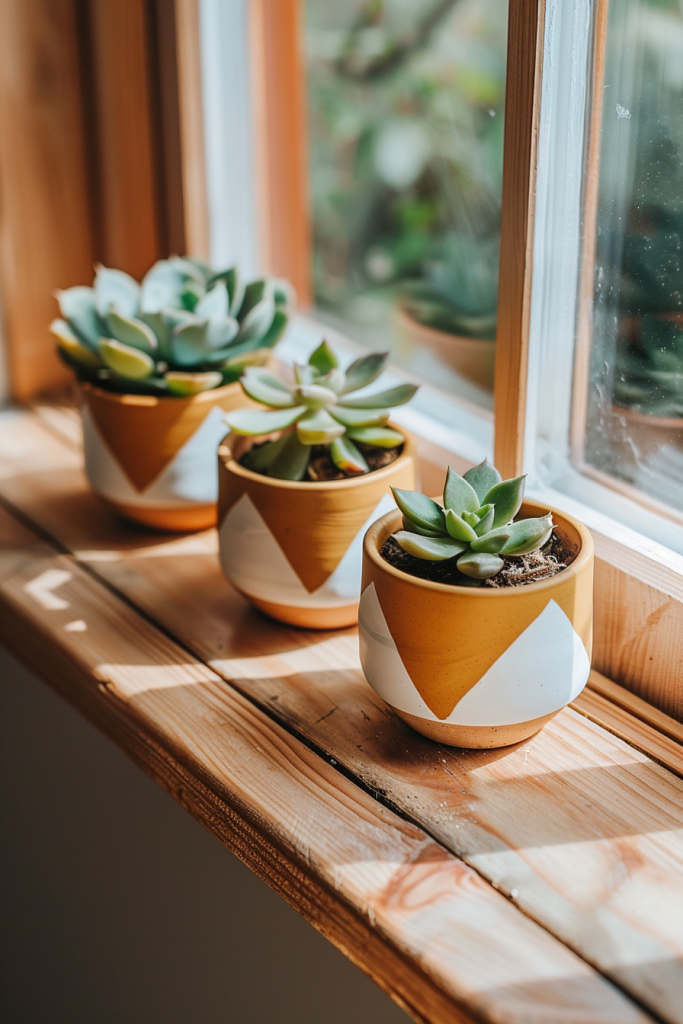
Plants instantly make a bedroom feel more alive. Painting your own terracotta pots is one of the easiest ways to add a personal, aesthetic touch to your room without spending much at all.
What you need:
- Terracotta pots (any size)
- Acrylic paint
- Brushes
- Sealant spray (optional but recommended)
How to make it:
Wipe the pots clean and let them dry completely. Apply a base coat and let it dry before adding any pattern on top. Simple designs work best, a solid color with a contrasting rim, clean stripes, or loose abstract brushstrokes all look great and are easy to pull off. Finish with a sealant spray, especially if you’re actually growing plants in them.
Tip: Terracotta absorbs paint quickly. Apply two coats for even coverage, and let the first coat dry fully before adding the second.
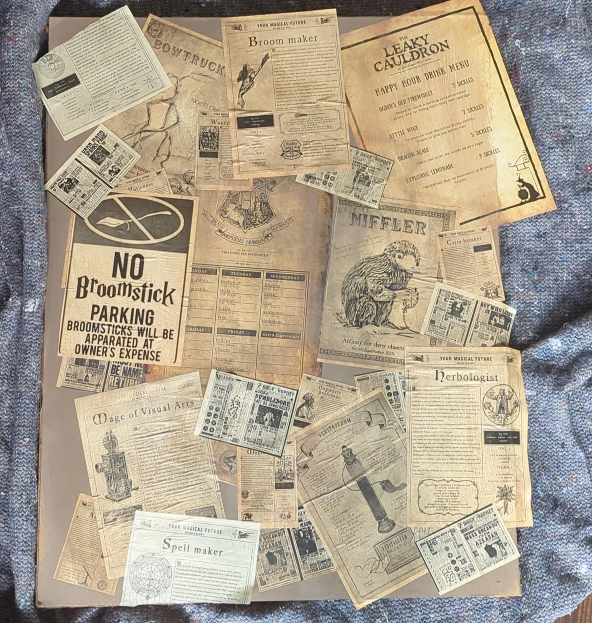
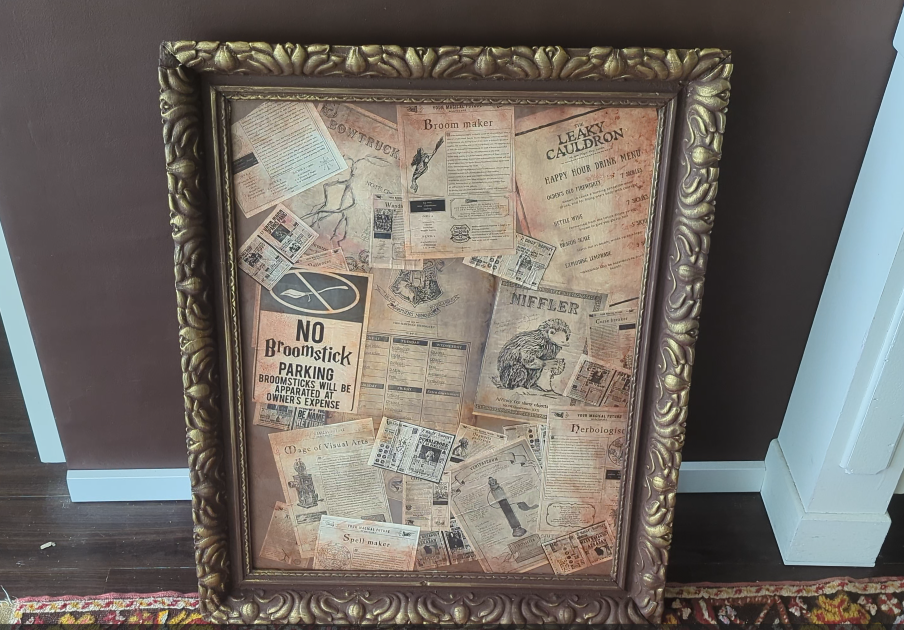
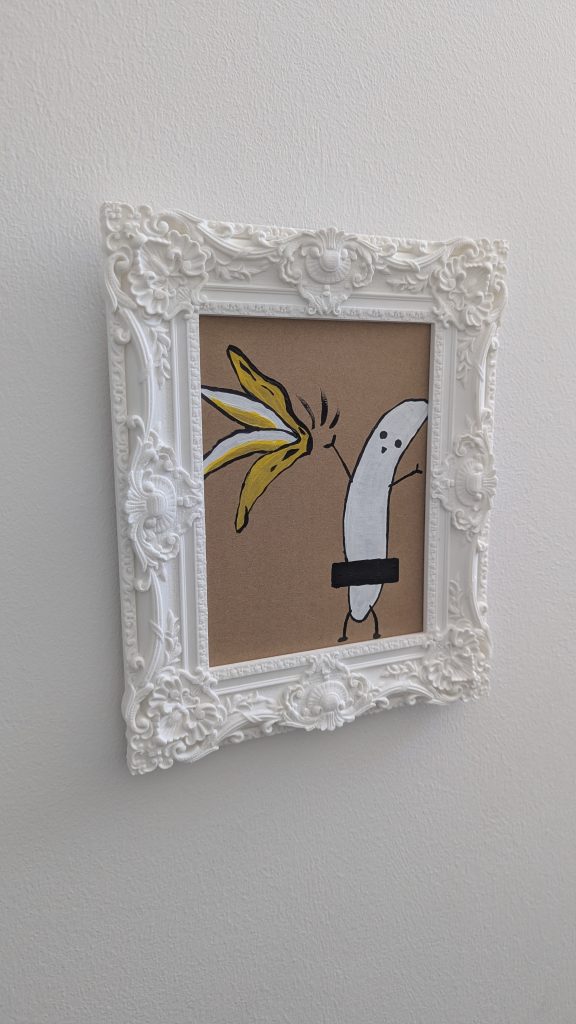
5. DIY Magnetic Board Made From an Old Frame
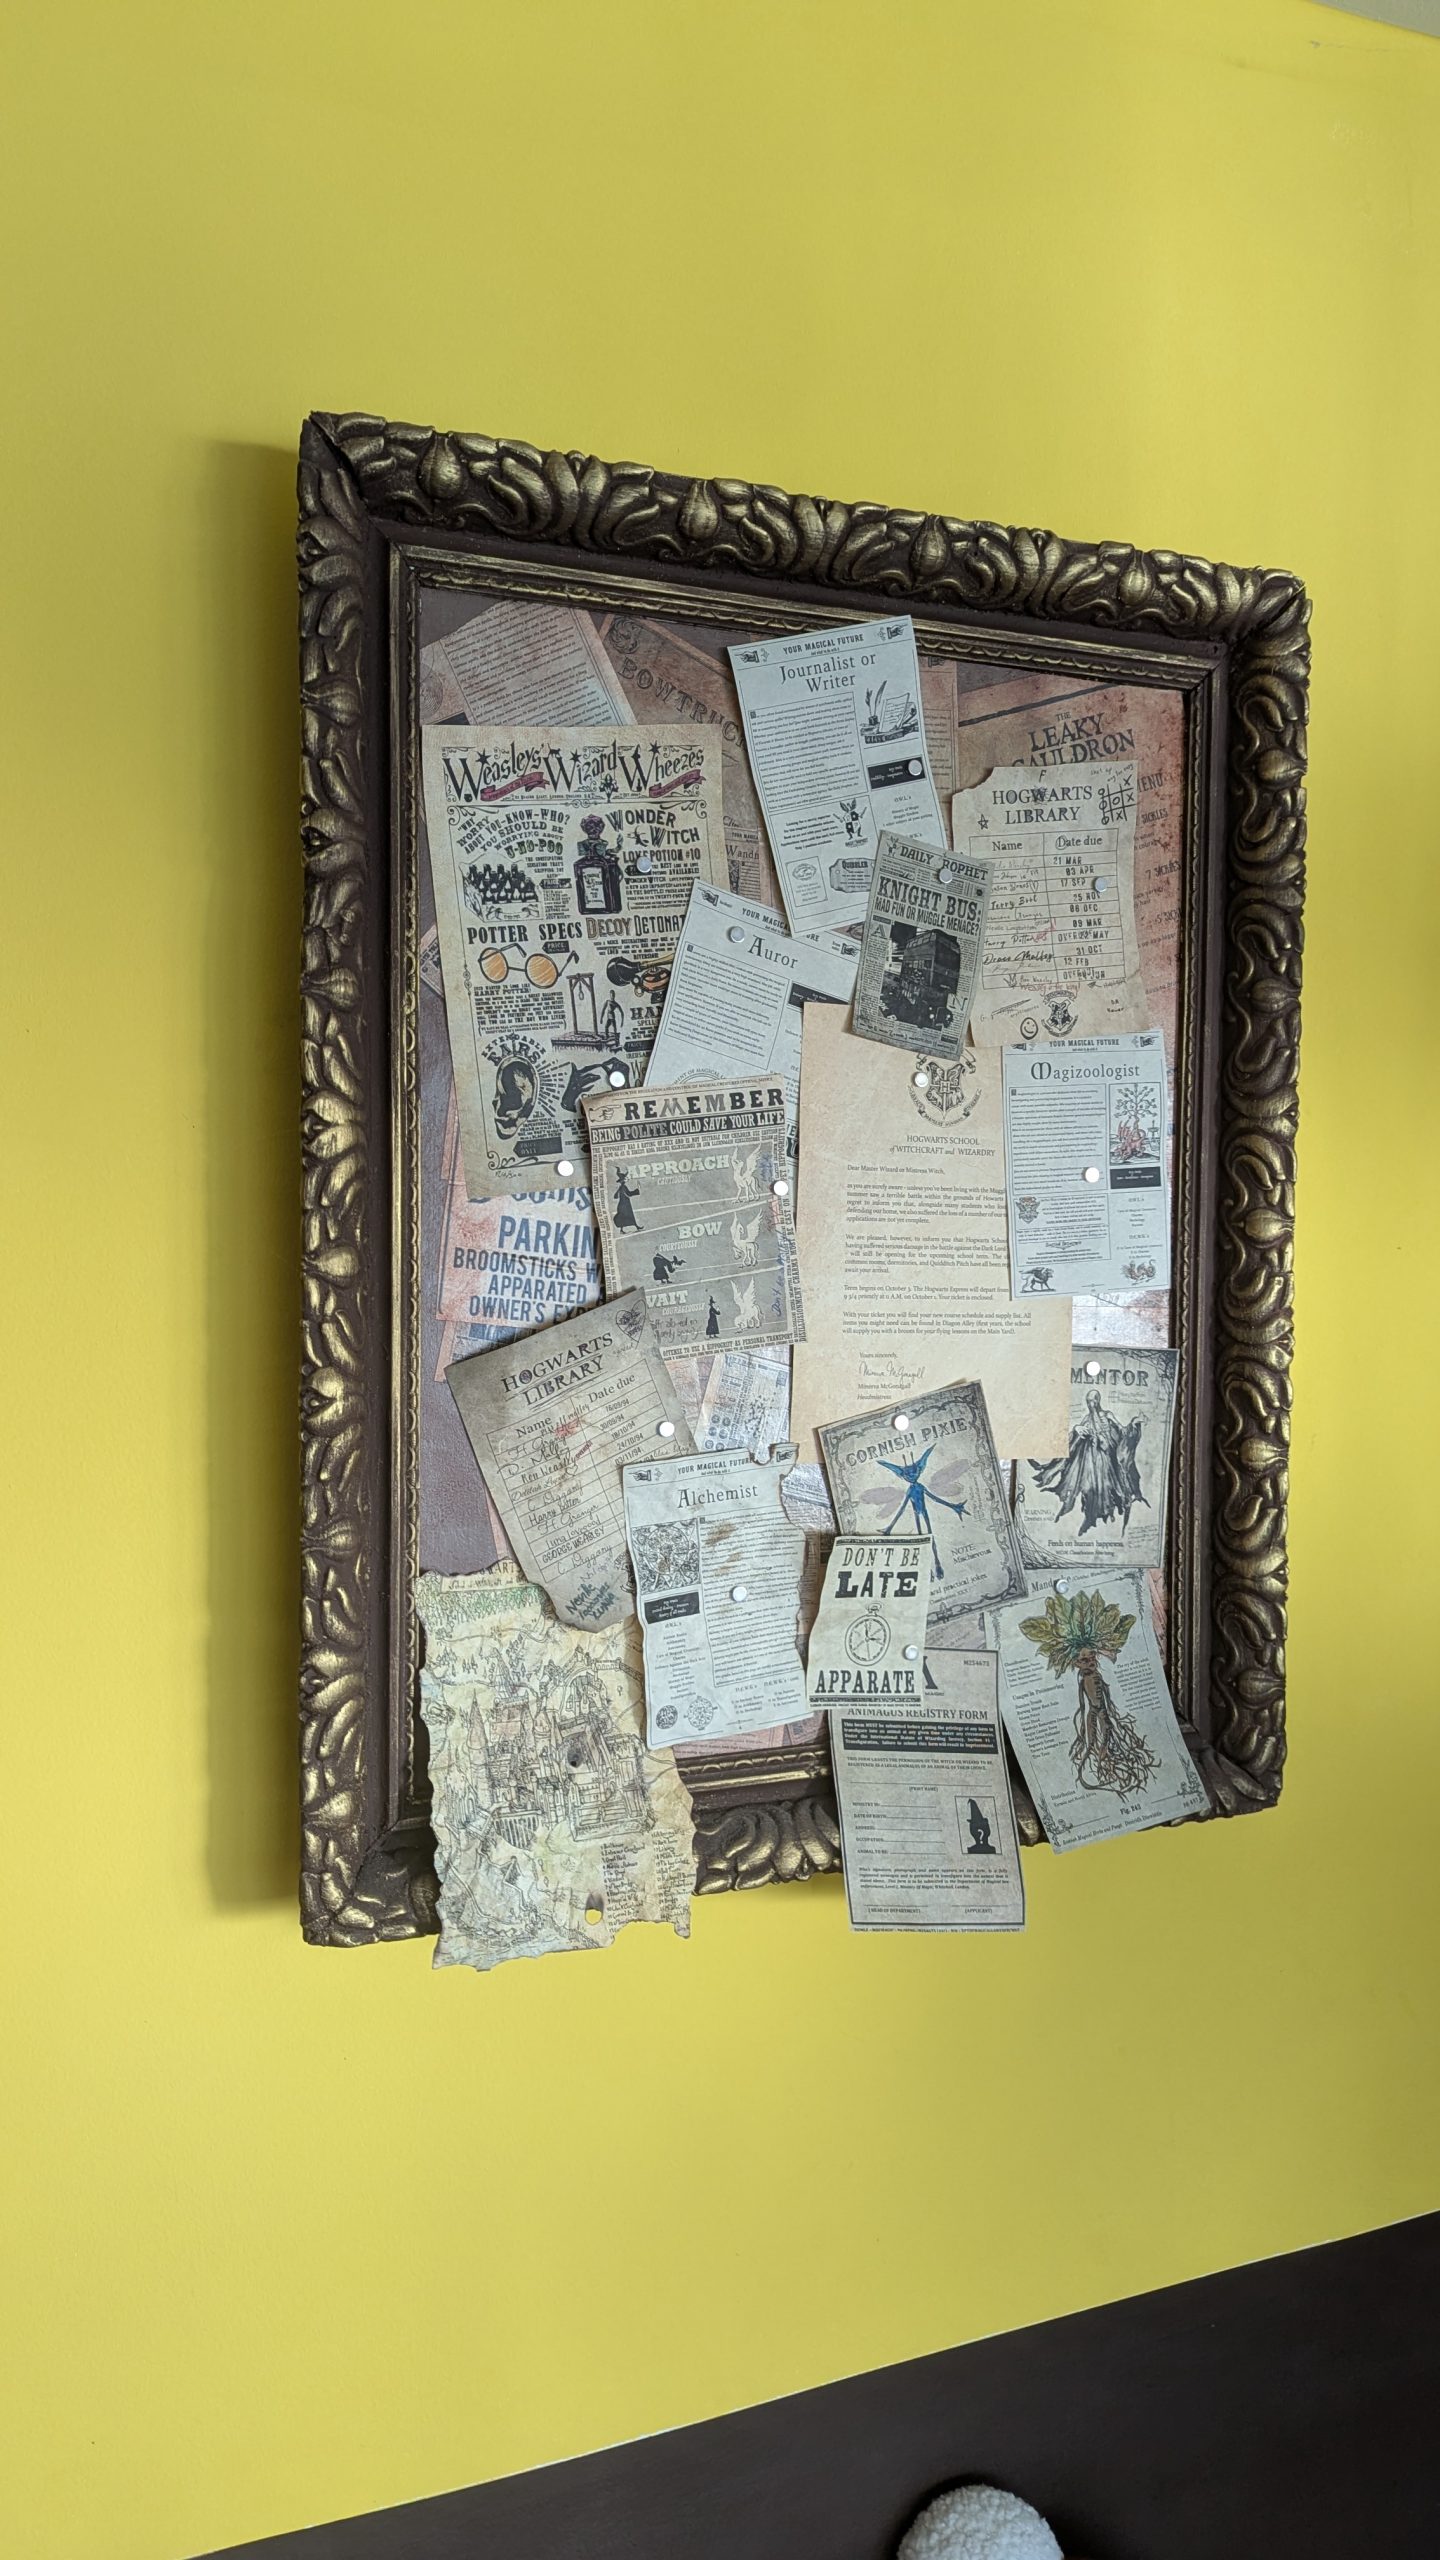
This is one of those projects that looks like something you bought, not something you made. It starts with an old picture frame, the kind with a canvas or linen backing, and turns it into a functional, personalized magnetic board for notes, photos, and reminders.
I made mine using an old oil painting frame. I used decoupage to apply Harry Potter inspired poster prints to the linen of the frame itself, which gave it a completely different look before I even touched the backing. Then I attached a thin metal sheet to the back of the canvas, which is all you need to make magnets stick. The result is a wall piece that’s both decorative and genuinely useful.
What you need:
- An old picture frame with a canvas or linen backing (thrift stores are great for these)
- Decoupage glue (Mod Podge works well)
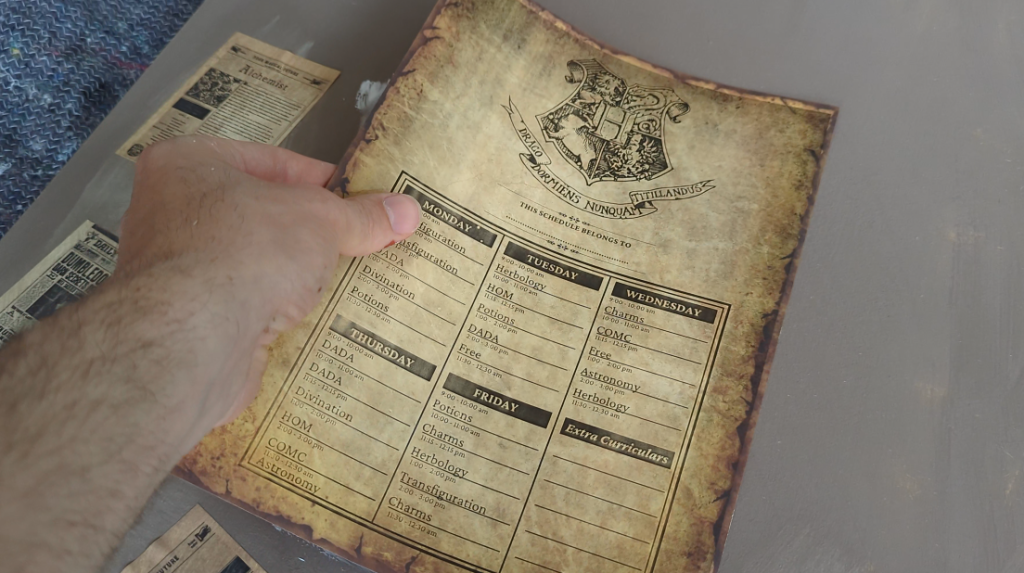
- Printed images or poster cutouts for the frame decoration
- A thin metal sheet (cut to fit behind the canvas)
- Strong adhesive or staple gun to attach the metal sheet
- Small magnets
- Photos, notes, or anything else you want to display
How to make it:
I have a complete beginners guide for decoupage right here.
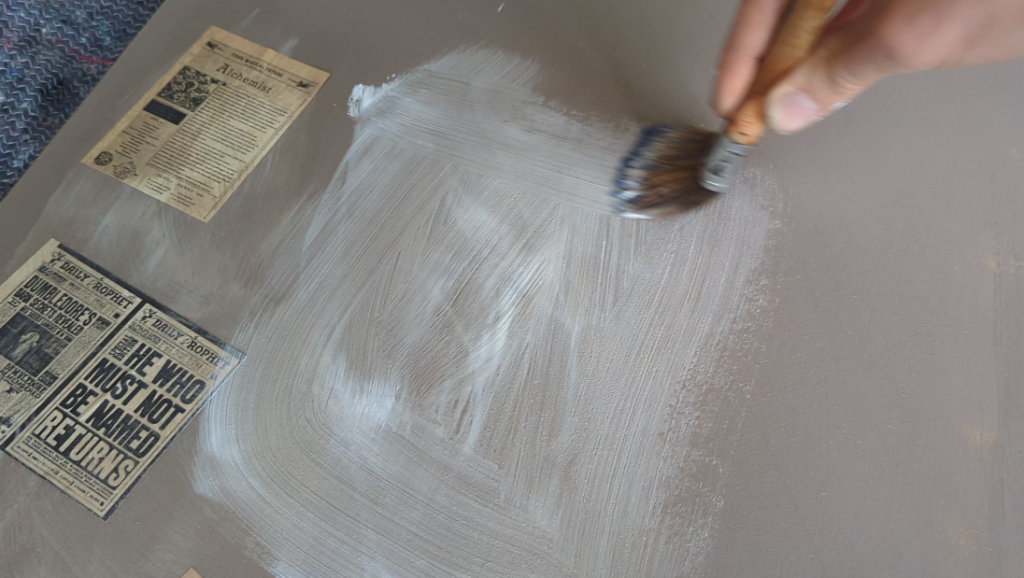
Start with the frame decoration. Cut your printed images into pieces and apply them to the linen surface using decoupage glue. Brush a layer onto the surface, press the paper down, and brush another layer on top. Let it dry completely. You can cover just the border of the linen, the whole surface, or any arrangement you like.
Once the decoupage is dry, cut your metal sheet to fit the frame and attach it firmly to the back of the canvas using strong adhesive or a staple gun. The canvas acts as the display surface and the metal behind it lets magnets grip anywhere across the whole piece. Hang the frame on the wall and use small magnets to pin photos, notes, to-do lists, or anything you want to keep visible.
Tip: Thrift store oil paintings are perfect for this. The frames are often beautiful and the canvas is already stretched and sturdy. You’re not ruining anything by decoupaging over an old painting nobody wanted.
6. DIY Fabric Wall Hanging
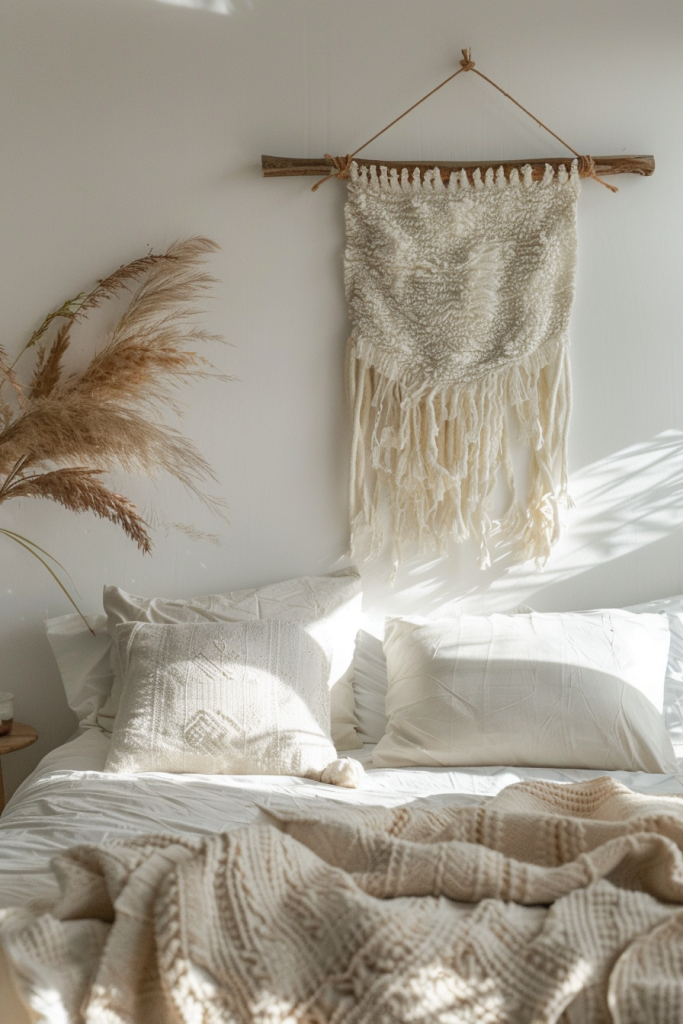
A fabric wall hanging adds texture that flat wall art simply can’t. It’s one of the quickest ways to get a boho or aesthetic bedroom feel without buying anything expensive.
What you need:
- A wooden dowel or thick branch (around 30–40 cm)
- A piece of fabric, a small blanket, or a textured scarf
- Twine or jute string
How to make it:
Fold the top edge of your fabric over the dowel and fix it in place with a line of hot glue or a few stitches. Tie twine to both ends of the dowel for hanging. You can leave it as is, or cut the bottom edge into fringe for a more finished look. Hang it above your bed, above your desk, or on any large empty wall.
Tip: Vintage scarves, fabric scraps, and even large tea towels work perfectly for this. You don’t need to buy anything new.
7. DIY String Art
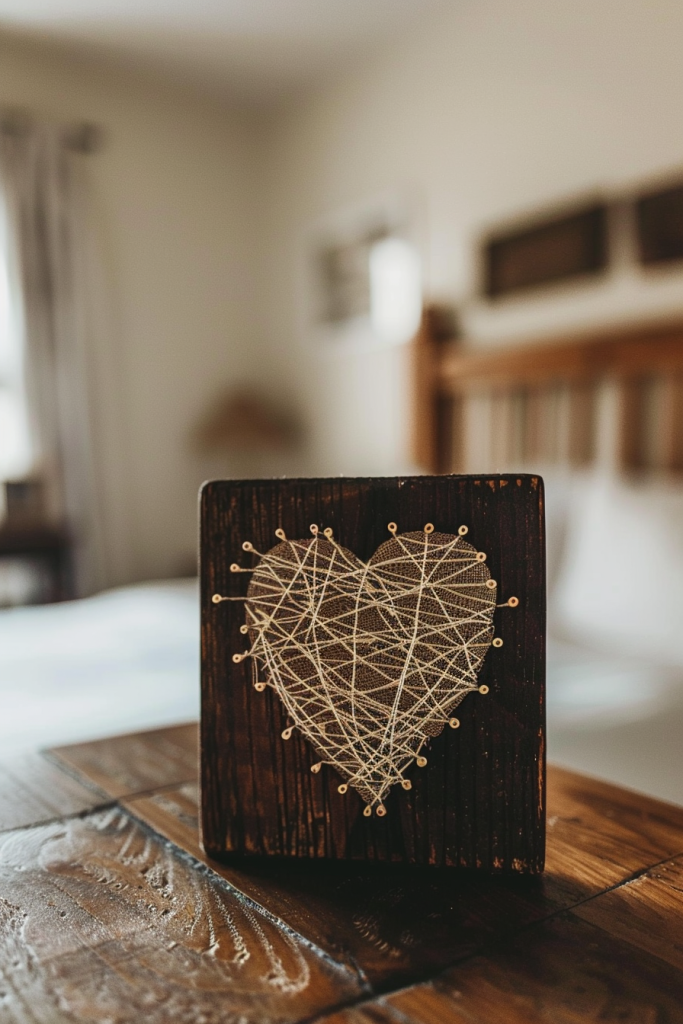
String art looks complicated, but it’s actually very straightforward once you understand the method. You nail a shape into a board and wind colored thread around the nails to fill it in.
What you need:
- A small piece of wood or MDF (around 20×20 cm)
- Small nails or panel pins
- Colored thread or embroidery floss
- A hammer
- A printed shape template (heart, star, initial letter)
- Sandpaper and paint for the board (optional)
How to make it:
Paint and sand your board first if you want a cleaner look. Print your chosen shape and tape it to the board. Hammer nails along the outline, spaced about 1 cm apart. Remove the paper template. Tie one end of your thread to a nail and begin wrapping it back and forth across the shape in a random criss-cross pattern until the shape is filled in. Tie off the end and trim any excess.
Tip: Simple shapes work best for a first attempt. A letter initial is ideal because straight lines are easier to nail than tight curves.
8. DIY Giant Paper Flower Lamp
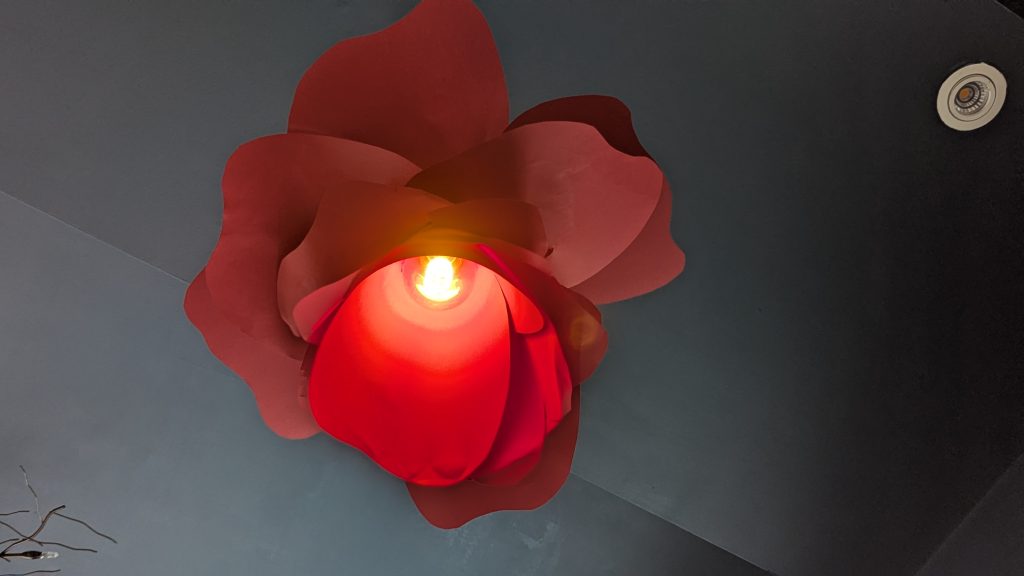
This is my favorite project on the whole list. It looks like something from a designer boutique, it costs almost nothing to make, and it’s genuinely one of those pieces that stops people in their tracks when they walk into the room.
The idea is simple: you take a bare light bulb socket and cover it in paper petals to create an oversized paper flower lamp. The petals diffuse the light softly and the whole thing hangs like a sculptural pendant light.
Important safety note: You must use an LED bulb for this project. LED bulbs stay cool to the touch. Incandescent and halogen bulbs get extremely hot and will be a fire hazard with paper this close to the heat source. Do not skip this step.
What you need:
- A pendant light socket with a cord (these are inexpensive and easy to find online)
- An LED bulb
- Cardstock or thick crepe paper in your chosen color
- Scissors
- A hot glue gun
- A ceiling hook for hanging
How to make it:
Cut your petals from cardstock or crepe paper. You’ll need a lot of them. plan for at least 10 –15 petals depending on the size of your lamp. Cut them in two or three sizes: large petals for the outer layers and smaller ones for the inner layers near the bulb.
Starting at the bottom of the socket, begin gluing petals in a ring, pointing outward and slightly downward. Work your way upward in overlapping rings, using slightly smaller petals as you get closer to the top. The finished shape should look like a large, full bloom. Wide and open at the bottom, tighter near the cord at the top.
Screw in your LED bulb, install the ceiling hook, and hang the finished lamp.
I used regular crafts paper but you can also use crepe paper for a softer light.
Tip: Crepe paper gives a softer, more realistic petal texture than cardstock and is easier to curl and shape. Pull it gently over a pen to curl the petal edges before gluing for a more natural look.
Tip: White and blush pink petals look beautiful when lit. The light glows through the paper in a way that plain white paper can’t achieve on its own.
9. DIY Painted Canvas Art
You don’t need to be a painter to make something worth hanging. Abstract art, word art, and simple geometric patterns are all within easy reach with basic acrylic paints and a bit of patience.
What you need:
- Canvas panel or stretched canvas
- Acrylic paint in 2–4 colors
- Paintbrushes
- Painter’s tape (optional, for geometric designs)
How to make it:
For geometric art: apply painter’s tape in a pattern across the canvas, paint over everything, and peel the tape off while the paint is still slightly wet. The lines will be crisp and clean.
For abstract art: paint the whole canvas in one base color, let it dry, then add wide loose brushstrokes in a second color. There’s no wrong move here.
For word art: sketch your chosen word lightly in pencil first, then paint over the letters carefully with a thin brush.
Tip: Two-color combinations are often stronger than you’d expect. White and terracotta, black and mustard, or navy and cream all make striking, simple pieces.
10. DIY Macrame Hoop Wall Art
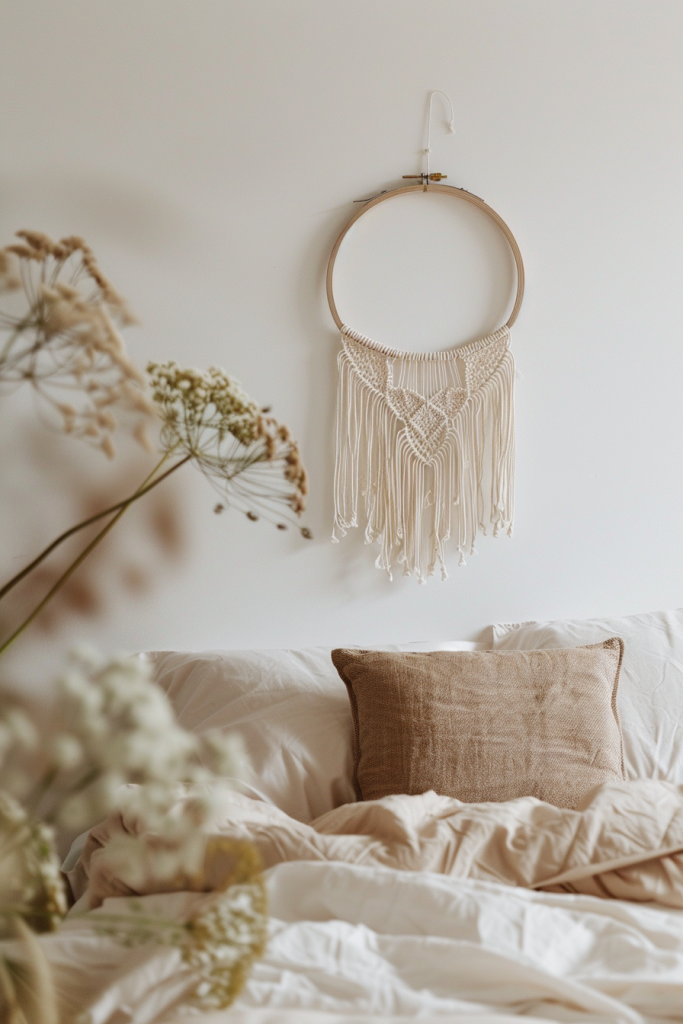
A macrame hoop is one of the most popular DIY room decor ideas for teens because it looks much more intricate than it actually is. You can make a basic version in under 30 minutes.
What you need:
- A wooden embroidery hoop (15–25 cm diameter)
- Macrame cord or chunky yarn
- Scissors
- Optional: beads, feathers, or dried flowers
How to make it:
Fold a length of macramé cord in half and loop it onto the bottom of the hoop using a lark’s head knot. Fold the cord in half, place the loop over the hoop, then pull the two ends through the loop and tighten. Repeat with more cords until the bottom half of the hoop is covered. Tie simple overhand knots across the hanging cords to create a knotted fringe, then trim the ends straight across or into a V-shape. Add beads or feathers to a few strands for extra detail.
Tip: Even a simple untied fringe with no knotwork at all looks great. You can always add more detail later once you’re comfortable with the method.
11. DIY Mason Jar Desk Organizer
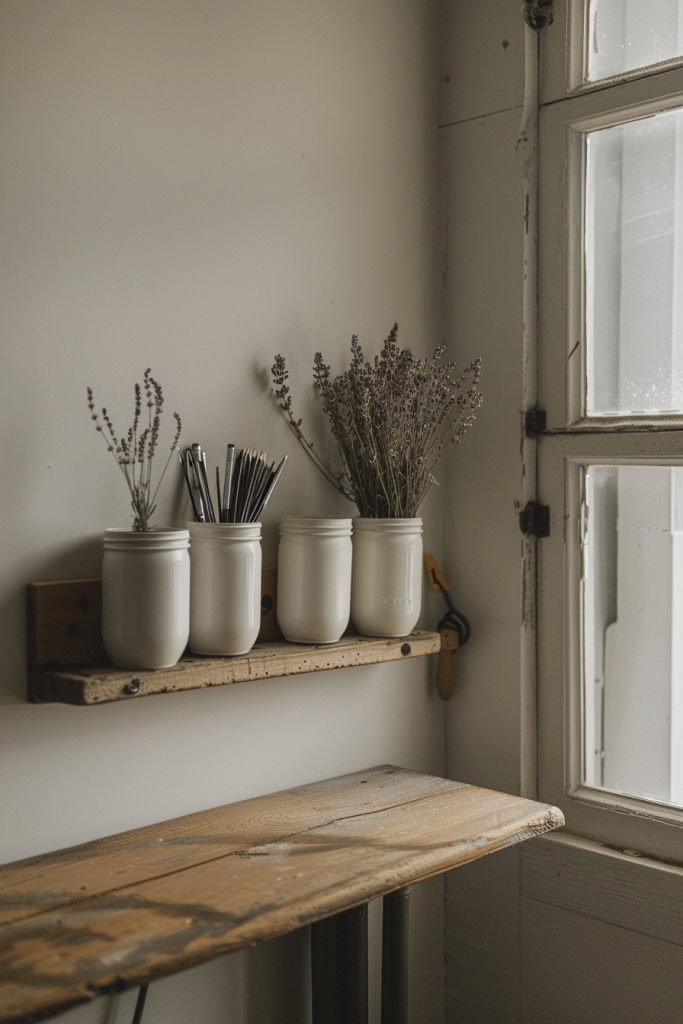
This project turns three basic mason jars into a wall-mounted organizer that looks clean and intentional. It’s also one of the most genuinely useful things on this list.
What you need:
- 3 mason jars (same size)
- A piece of scrap wood or a painted plank
- Hose clamps (from a hardware store) or strong metal wire
- Screws
- Acrylic paint for the wood
How to make it:
Paint your plank in a color that fits your room and let it dry. Attach the hose clamps to the wood, spaced to match the diameter of your jars. Tighten each jar into a clamp. Mount the whole plank to the wall using screws. Use the jars for pens, scissors, and brushes. Or fill them with dried flowers or small decorative items instead.
Tip: Spray paint the jars in a matte color before mounting them. Painting them white, black, or terracotta makes the whole organizer look more cohesive and less like three random jars on a wall.
12. DIY Air Dry Clay Trinket Dish
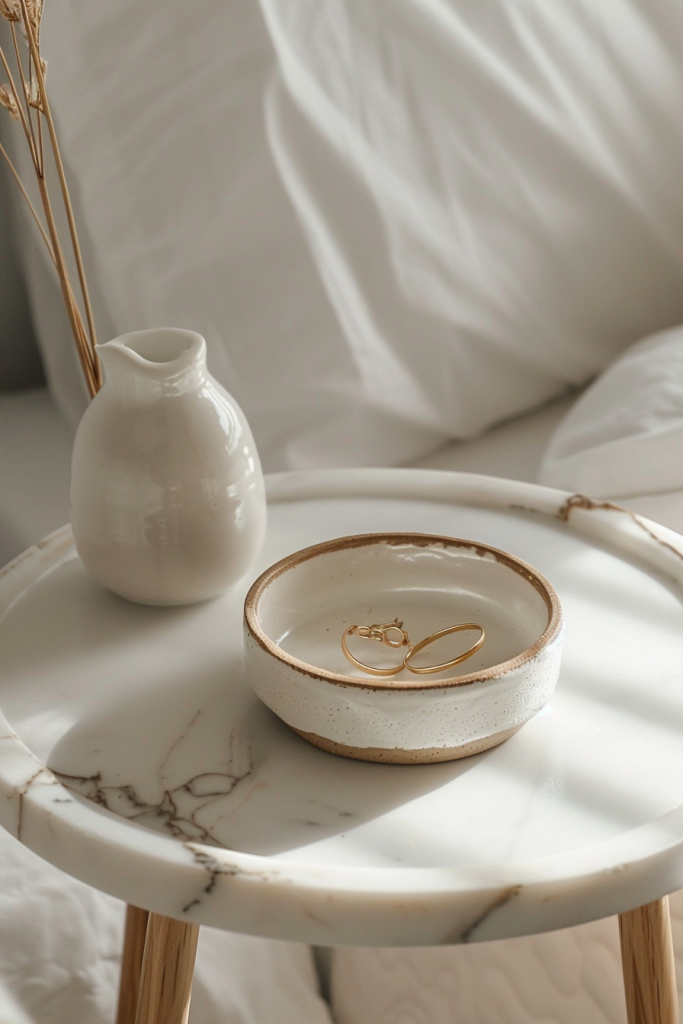
A trinket dish for rings, earrings, and small daily items is one of the most satisfying things to make. Air dry clay is inexpensive, easy to shape, and doesn’t require a kiln or an oven.
What you need:
- Air dry clay
- A small bowl or lid to use as a mold
- A rolling pin or smooth bottle
- Acrylic paint and a clear sealant
- Optional: a stamp or texture tool for decoration
How to make it:
Roll the clay to about 5mm thickness. Press it gently into a small bowl or over the back of a curved lid to give it shape. Smooth the edges and add any texture while the clay is still soft. Let it air dry for 24–48 hours. Once dry, paint it in your chosen color and seal with a clear sealant to protect the finish. A single matte color with a metallic gold or silver rim looks especially clean.
Tip: Air dry clay shrinks slightly as it dries, so don’t be alarmed if it lifts out of the mold on its own. That’s completely normal.
13. DIY Pom-Pom Garland
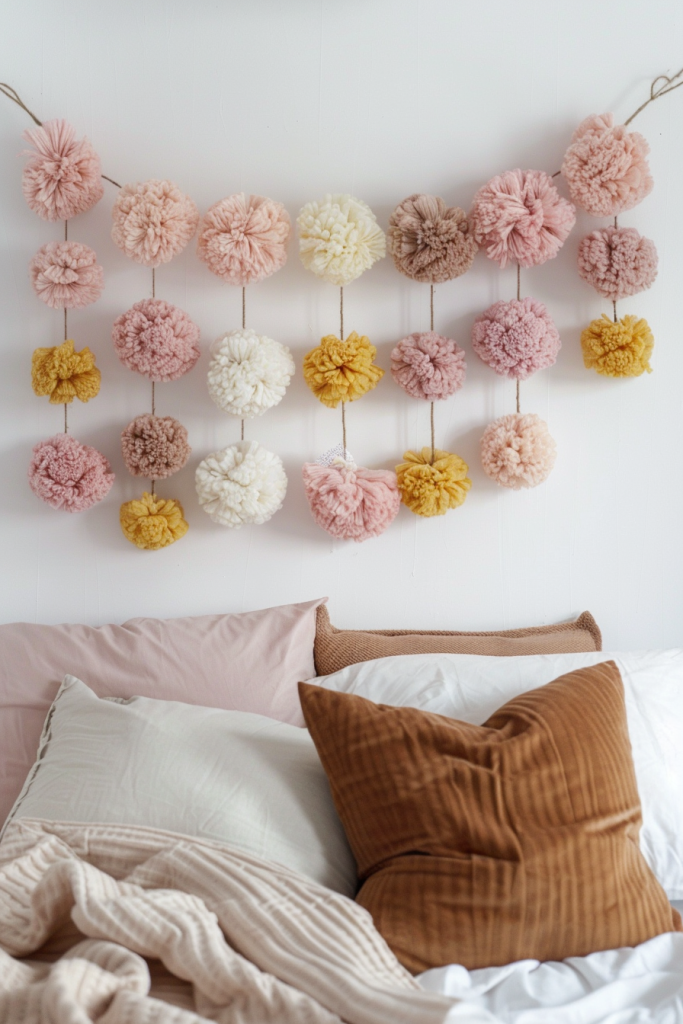
A pom-pom garland is a simple, colorful addition to any bedroom wall, headboard, or shelf. You can make the whole thing in an evening, and it’s a great way to use up leftover yarn.
What you need:
- Yarn in your chosen colors (3–5 colors work well)
- Scissors
- A small piece of cardboard (for winding the yarn)
- Twine or string
How to make it:
Wrap yarn around a piece of cardboard about 50–60 times. Slide the wound yarn off carefully, tie a separate piece of yarn tightly around the center, and cut the loops at both ends. Fluff out the cut ends and trim any uneven pieces to shape the pom-pom into a round ball. Repeat to make as many as you want. Thread each pom-pom onto twine, spacing them evenly, and hang the finished garland across a wall, above your bed, or along a shelf.
Tip: Mix sizes by winding yarn around wider or narrower pieces of cardboard. Larger pom-poms take more yarn but make the garland look fuller and more finished.
14. DIY Dreamcatcher
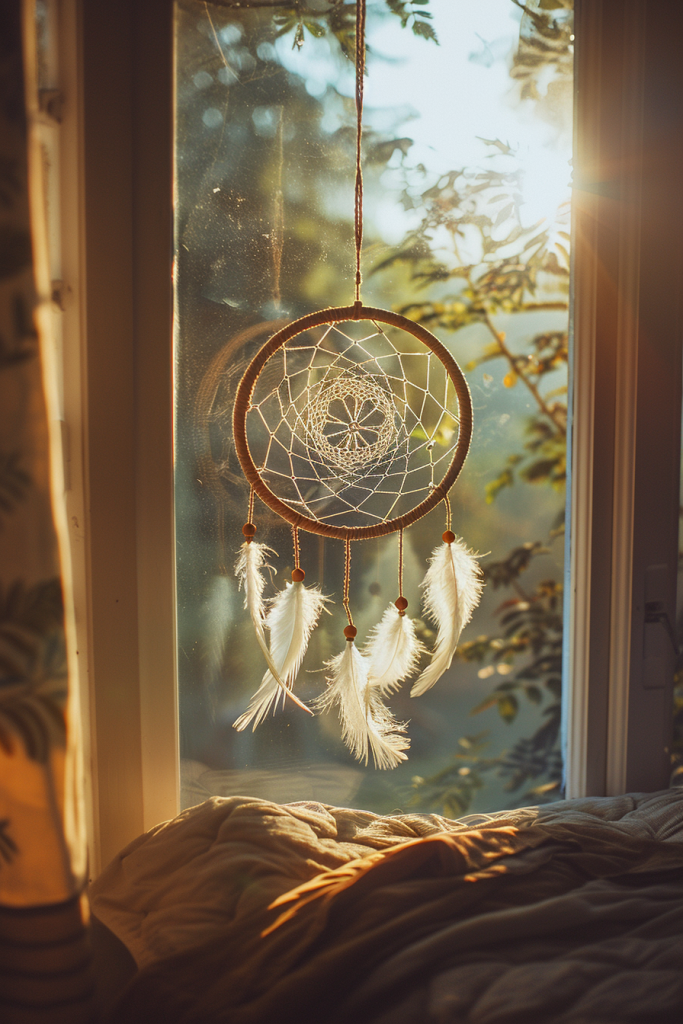
A dreamcatcher is one of those classic room ideas for bedrooms that still looks beautiful and never really goes out of style. The basic weaving method is easy even for total beginners.
What you need:
- A wooden or metal hoop (an embroidery hoop works perfectly)
- Thin macramé cord or sinew
- Feathers, beads, and small charms (optional)
- Ribbon or strips of fabric
How to make it:
Tie your cord to the top of the hoop and weave it back and forth across the inside, looping around the hoop edge and through the middle of the previous loop each time. Pull each loop moderately tight as you work inward. The web pattern forms naturally as you go. When you reach the center, tie off the cord. Tie ribbons or strips of fabric to the bottom of the hoop and add beads and feathers to the hanging ends.
Tip: Look up a simple “dreamcatcher weave pattern” reference image before you start. The pattern makes much more sense once you can see it, and it becomes intuitive within the first few loops.
15. DIY Painted Letter or Word Sign
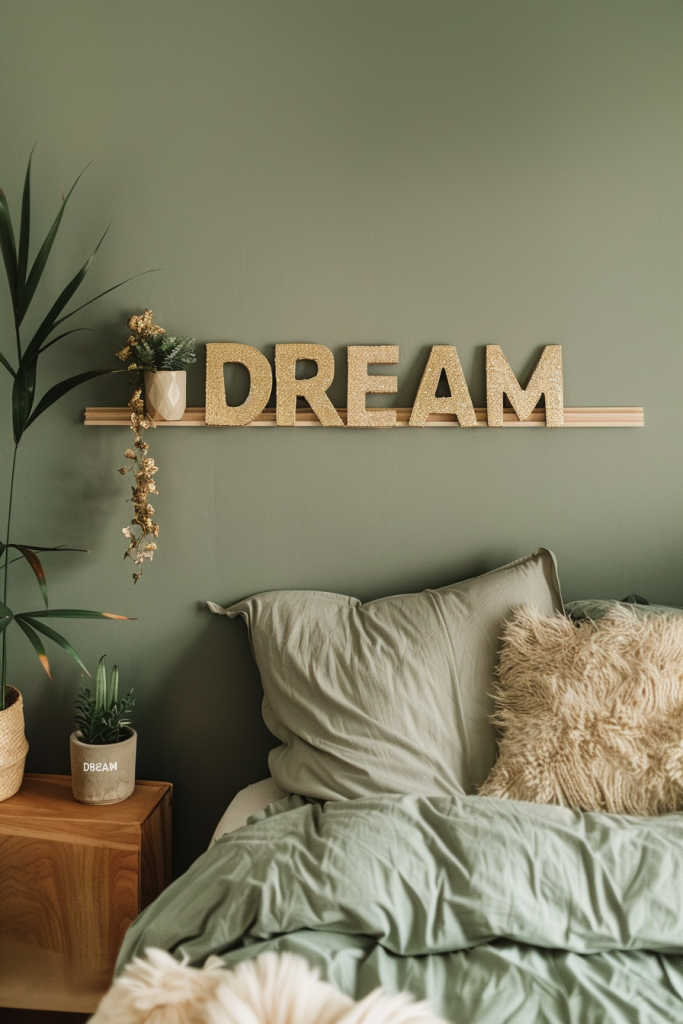
A word sign is one of the most personal things you can put in your bedroom. Your name, a word you love, or a short phrase that actually means something to you, hung on the wall, it turns blank space into something that says something real about who you are.
What you need:
- Cardboard letters (from craft stores) or thick cardboard cut into letters yourself
- Acrylic paint
- Brushes
- Hot glue (if combining multiple letters into a word)
- Optional: glitter glue, washi tape, or sequins for extra decoration
How to make it:
Paint each letter in your chosen base color. Apply at least two coats for even coverage and let each coat dry fully. Once dry, add detail. Stripes, a second color on one side, glitter, or washi tape accents.
If you’re cutting letters from cardboard yourself, score the edges and fold them to give each letter a flat back for wall mounting. Hang the finished letters with command strips.
Tip: A single large word almost always makes more visual impact than a long phrase. “Dream,” “Create,” “Wild,” or your own name are always strong starting points.
Final Thoughts
There’s no right order to work through this list. Pick the project that excites you most and start there.
You’ll find that one project almost always leads to another. Once you see what handmade decor can do for a room, it becomes hard to stop. The best part about easy DIY room decor is that nothing is permanent.
If you change your mind about something, you can repaint it, rearrange it, or try something completely different. Your room gets to grow and change along with you.
Whether you’re putting together a dream room setup from scratch or just adding a few personal touches to a space you’ve lived in for years, handmade always wins. It’s the difference between a room that looks nice and a room that actually feels like home.